Focus keyphrase: crochet gauge hook size
You’ve found the perfect pattern and chosen a yarn you love. You start crocheting, and a few hours in, you realize your project is either too small or way too big. 🤯 This is a common and frustrating problem for every crocheter, and the solution lies in a simple concept that seems intimidating: crochet gauge hook size. But don’t worry! This guide will demystify gauge and give you a simple, repeatable process to pick the right hook for every project, every single time. 📏💡
What is Crochet Gauge and Why Does it Matter?
At its core, gauge is the number of stitches and rows in a specific measurement, usually 4 inches (10 cm). It's the blueprint for your project. A pattern will tell you, for example, "Gauge: 16 stitches and 14 rows per 4 inches." This number is the key to ensuring your finished project matches the designer's intended size.
Why is it so important? Because every crocheter has a unique tension. Your "double crochet" might be tighter or looser than the pattern designer’s, meaning you might need a different crochet gauge hook size to get the same results. Ignoring gauge can lead to a sweater that doesn't fit or a blanket that is far too big or small.
The 3-Step Process to Perfect Gauge
This simple process will help you match your tension to any pattern.
Step 1: The Swatch 🧶
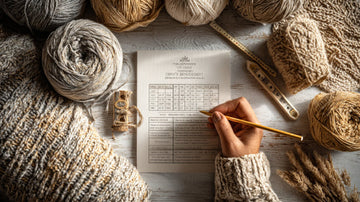
The first step is to create a small test square, called a gauge swatch.
-
Yarn & Hook: Use the same yarn and the same hook size that your pattern recommends.
-
Size: Make your swatch larger than the required measurement. If the pattern says to measure over 4 inches, make your swatch at least 5-6 inches wide. This ensures you get a more accurate measurement in the middle of your fabric, away from the potentially uneven edges.
-
Stitch: Use the same stitch the pattern specifies for the gauge. If it says "16 sc per 4 inches," work a swatch in single crochet.
Step 2: The Measurement 📏
Once your swatch is finished, lay it flat and relax it. Do not stretch it.
-
Measure Stitches: Use a ruler or a gauge ruler to count the number of stitches in your required measurement (e.g., 4 inches). Place the ruler on top of the stitches and count them carefully.
-
Measure Rows: Do the same for the rows. Count how many rows you have per 4 inches.
-
Compare: Write down your numbers and compare them to the gauge listed in the pattern.
Step 3: The Adjustment 🔧
This is the most crucial step. Your goal is to adjust your hook size until your numbers match the pattern’s.
-
Too Many Stitches? (Gauge is too tight) Your work is too small. You need to use a larger hook. Go up a size (e.g., from a 5.0mm to a 5.5mm).
-
Too Few Stitches? (Gauge is too loose) Your work is too big. You need to use a smaller hook. Go down a size (e.g., from a 5.5mm to a 5.0mm).
Repeat the process until you match the pattern’s gauge. It may seem tedious, but it guarantees your project will turn out perfectly. A hook that promotes consistent tension, like our Yarniss Large Ergonomic Crochet Hooks Set, can make this process much easier.
Beyond the Basics: Gauge for Different Projects
The concept of gauge is universal, but its application changes depending on your project.
-
Amigurumi Gauge: For stuffed toys, gauge isn’t about size; it's about density. You want a hook small enough to create a tight fabric with no holes for the stuffing to show through. Our amigurumi blog section has great tips on how to achieve this perfect, tight gauge. For a simple starting project, our Yarniss Beginner Crochet Kit Bunny includes all the tools needed to get the perfect gauge.
-
Garment Gauge: For wearables, gauge is absolutely critical. Just a few stitches off per inch can mean a sweater that's two sizes too big or too small. A gauge swatch is a non-negotiable for these projects.
Expert Tips for Matching Hooks & Yarn
With a solid understanding of the 3-step process, here are some final expert tips to ensure every project is a success.
-
Read the Yarn Label: The yarn label provides a starting point for the recommended hook size. Always check this first!
-
Test Your Hook: Take a few moments to crochet with your yarn and hook. How does it feel? Does the yarn glide smoothly? Does your hand feel comfortable? This is the best way to determine if a combination will work for you. You can find more information on the right hooks for you on our Yarniss crochet hooks blog.
-
Embrace a Good Hook Set: Having a full range of hooks allows you to adjust your size to match your gauge easily. A comprehensive set ensures you'll always have the right tool for the job. Our Yarniss crochet kit provides a variety of hooks to get you started.
Final Thoughts 😊
Gauge is not a barrier to your creativity; it’s a tool that guarantees success. By taking a few extra minutes to create and measure a swatch, you can ensure that every project turns out perfectly. It’s a small effort for a lifetime of beautiful, handmade creations.

